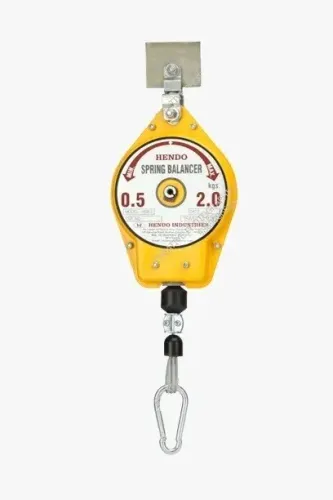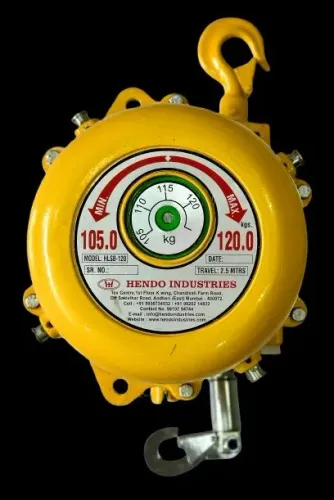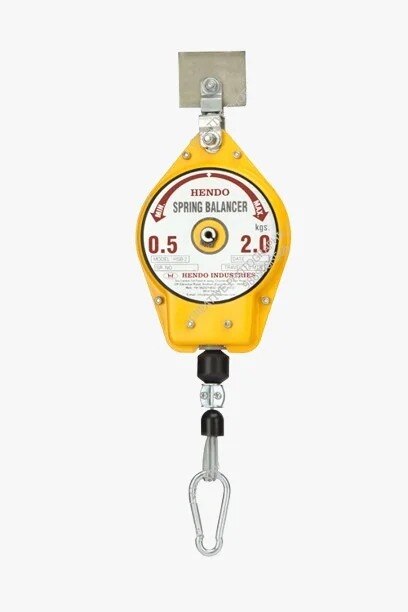
A flat spring balancer needs more than occasional cleaning: incorrect tool weight, contaminated cable entries, excess tension and damaged suspension parts can turn a useful workstation aid into a drop or recoil hazard. By following a shift-based inspection, controlled cleaning policy, load test and clear repair thresholds, you can keep HSB units in service without opening their preloaded spring housing.
Key takeaways
- Inspect the balancer before every shift with the tool removed and spring energy controlled.
- Clean the exterior without opening the spring housing or disturbing stored energy.
- Quarantine balancers showing damaged springs, cables, hooks, housings, or abnormal drum movement.
- Recheck load range and balance after every tool change or adjustment.
Inspect the balancer before every shift
A flat-series balancer needs a documented pre-shift check before an operator takes the tool. For hands-on inspection, apply lockout/tagout, remove the tool, support the balancer independently, and let the spring or cable reach a controlled, unloaded condition. Stored spring energy can move the drum or hook without warning.
- Confirm the asset ID, model, serial number, mounting point, and suspended-tool weight match the maintenance record.
- Examine the casing and suspension eye for cracks, distortion, loose fasteners, missing guards, or movement at the mounting.
- Inspect the cable or flat spring for broken wires, kinks, flattened sections, bird-caging, corrosion, rubbing, and damaged end fittings.
- Check the hook for a closed throat, free rotation, twisting, cracks, and a working safety latch; inspect the tool clamp for secure attachment.
- After removing lockout under the site procedure, test the complete tool package without anyone beneath it. Confirm smooth upward and downward travel, full return, no sudden recoil, and stable positioning near the operator’s working height.
- Stop use if the tool will not stay at its selected height, returns slowly, or requires force to move. These signs indicate an incorrect load range, friction, or spring fatigue.
Record defects, parts replaced, inspection date, suspended mass, and the person authorizing return to service. Compare travel with the installation baseline, and shorten the inspection interval for continuous cycling, upper-limit loading, metal dust, humidity, or chemical exposure. This is essential assembly line balancer care.
Clean contamination without entering the spring housing
Oil or coolant on the exposed cable needs wiping before it reaches the cable-entry point. Stop the workstation, remove the suspended tool, and support the balancer independently before cleaning. Never pull, bend, or unload the cable by hand while the spring is tensioned.
- Pick metal chips and weld spatter from the casing, suspension eye, hook, and cable with a soft brush or vacuum fitted for the debris.
- Lift dust from the housing and cable-entry area with a dry, lint-free cloth. Do not blast it with compressed air; the air stream can drive grit into the drum, spring, or brake.
- Wipe oil from external surfaces with a lightly damp cloth and a cleaner approved for the housing material.
- Remove coolant with a clean damp cloth, then dry the casing, cable, hook, and mounting area completely.
- Clean paint overspray only with the solvent named in the manufacturer’s instructions. Flooding the housing with solvent can carry dissolved contamination inside.
Keep liquid away from seams, vents, the cable-entry point, and any adjustment opening. Do not hose the balancer or spray cleaner directly onto it.
Do not open the spring housing or lubricate the enclosed spring, drum, brake, or cable mechanism as part of assembly line balancer care. Lubricate an external pivot or hook only when the manual identifies that point, lubricant type, and application quantity; otherwise, leave it dry.
A contaminated or stiff mechanism needs service, not extra oil, because oil can trap abrasive dust and hide developing damage.
Set inspection intervals and quarantine warning signs
Use the installation baseline to detect change: record the working height, travel smoothness, suspended-tool mass, model, serial number and asset ID. HSB-1 spring balancer maintenance and HSB-2 spring balancer maintenance use the same escalation logic; the model numeral does not establish capacity.
For flat-series spring balancer maintenance assembly line in Gurugram, shorten intervals for abrasive dust, monsoon humidity, chemicals, continuous cycling or operation near the upper load limit.
| Interval or trigger | Inspection action |
|---|---|
| Every shift | Check travel, return, cable or flat spring, hook and casing; investigate any change from baseline. |
| Weekly | Examine fasteners, suspension eye, tool clamp, safety latch and contamination; record defects. |
| Monthly | Measure working travel and return behaviour against the installation record; verify the complete suspended mass against the model plate. |
| Dropped tool, overload or impact | Lock out immediately, remove the tool, support the balancer independently and inspect before release. |
| Any warning sign | Quarantine the unit and authorise return only after service inspection. |
Remove it from service at once if it retracts unevenly, leaves cable slack, scrapes or pops, needs repeated tension adjustment, or shows a distorted housing, damaged suspension eye, failed hook latch or damaged cable.
“It still holds the tool” is not a safe test; these signs can indicate a failing spring, drum bearing, brake or attachment.
Apply lockout/tagout before close inspection or repair. Do not open the spring housing: its preloaded flat spring can move the drum or hook suddenly. Record the defect, parts replaced and person authorising return.
Verify load range and balance after every tool change
After every tool change, weigh the complete suspended package: tool, clamp, hose, chuck, cable, fittings and accessories. For HSB 1 spring balancer maintenance and HSB 2 spring balancer maintenance, compare that measured mass with the exact model plate or manual.
Do not infer capacity from the numeral in the model name; a balancer’s rating is a working range, not simply a maximum.
Test with no person beneath the load and use the actual installed mounting point. Confirm each of these conditions:
- The tool travels smoothly through its full intended upward and downward range.
- The balancer returns the unloaded tool fully without sudden recoil.
- The loaded tool rises and returns without sticking, dropping or drifting.
- The tool remains stable near the operator’s working height.
- The hook closes, rotates freely and retains the tool.
- The secondary restraint is fitted, secure and free from slack that permits a dangerous drop.
A short no-load pull test proves too little; spring behaviour and braking can change under the working load. If the tool will not remain near its selected height, stop use and check the measured load, friction and signs of spring fatigue.
Do not correct a mismatched load by exceeding the manufacturer’s tension-adjustment range: excess tension can cause violent retraction, while inadequate tension permits unexpected descent.
Record the asset ID, model, serial number, package mass, mounting location, test date and baseline travel behaviour. Authorise return to service only after the failed condition is corrected and the complete test passes.
Separate routine adjustment from flat spring repair
A production-floor adjustment means checking external mounting, tightening approved fasteners, cleaning the casing, and replacing a manufacturer-listed hook, cable, strip, latch, or clamp. It does not mean opening the spring housing or changing spring tension.
| Task | Production-floor action | Trained-technician action |
|---|---|---|
| External wear | Replace only the specified wear part with the correct model part | Confirm drum, end termination, and load rating after replacement |
| Balance setting | Confirm return through the recorded working height with the tool attached | Set force or preload using the model service procedure |
| Spring or drum fault | Isolate and tag the balancer; do not operate it | Replace a broken or distorted spring; service or replace the drum |
| Safety condition | Remove the tool, support the balancer independently, and apply lockout/tagout | Restore service after controlled testing and authorization |
Before flat spring balancer repair, unload the tool and let the cable or strip reach a controlled condition. Never weld, drill, or re-form a damaged spring, and never substitute a generic hook, cable, spring, or fastener. HSB-1 and HSB-2 require separate parts and records unless the manufacturer confirms interchangeability.
For flat series spring balancer maintenance assembly line in Gurugram, shorten inspection intervals for continuous cycling, near-limit loads, metal dust, monsoon humidity, or chemical exposure. Hendo Industries records can help you preserve the model-specific baseline, but your record must include the asset ID, serial number, tool mass, defects, parts changed, and return-to-service authorizer.
Related products
 | FLAT SERIES SPRING BALANCER FLAT SERIES SPRING BALANCER HSB-1 The HSB-1 Flat Series Spring Balancer by Hendo Industries is a compact and efficient lifting solution designed to improve productivity and reduce... View product → |
 | FLAT SERIES SPRING BALANCER FLAT SERIES SPRING BALANCER HSB-2 The FLAT SERIES SPRING BALANCER HSB-2 by Hendo Industries is a high-performance industrial balancing solution designed to support lightweight tools... View product → |
Frequently asked questions
What should you inspect before each assembly-line shift?
Apply lockout/tagout, remove the tool, support the balancer independently, and check the housing, cable or hook, drum movement, fasteners, and visible spring damage before use.
How do you clean a flat-series spring balancer safely?
Isolate the balancer, wipe contamination from the exterior with a suitable lint-free cloth, and keep fluids and tools out of the spring housing.
When should you quarantine a spring balancer?
Quarantine it for a damaged housing, frayed cable, distorted hook, broken spring, uncontrolled retraction, binding, unusual noise, or failure to hold the tool at the selected height.
What must you verify after changing the tool?
Confirm that the tool weight falls within the balancer's rated load range, then test smooth travel, neutral balance, return control, and secure tool attachment.
When is flat spring balancer repair required instead of adjustment?
Use routine adjustment only for the manufacturer's permitted balance setting. Send the balancer for qualified repair when the flat spring, drum, housing, cable, hook, or safety device is damaged.